개요
이 문서는 여러 노드 및 클러스터들을 관리하기 위해 Proxmox Datacenter Manager를 설치하는 방법에 대해 설명합니다.
Proxmox Datacenter Manager 설치
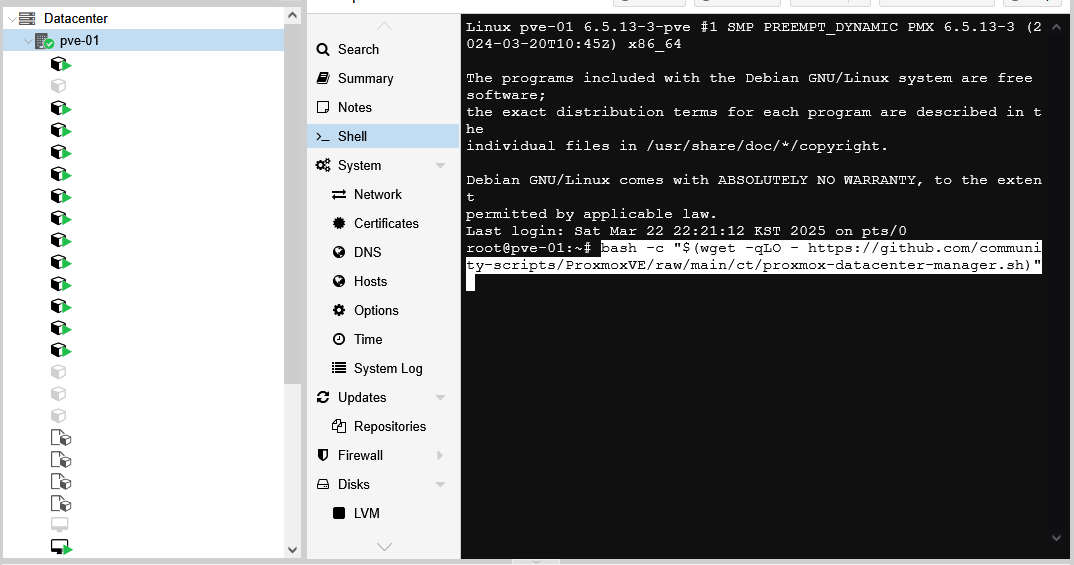
Proxmox Datacenter Manager를 설치하기 위해 Proxmox VE Helper-Scripts에서 설치 스크립트를 복사 후 설치를 원하는 노드의 shell에 붙여 넣습니다.
bash -c "$(wget -qLO - https://github.com/community-scripts/ProxmoxVE/raw/main/ct/proxmox-datacenter-manager.sh)"
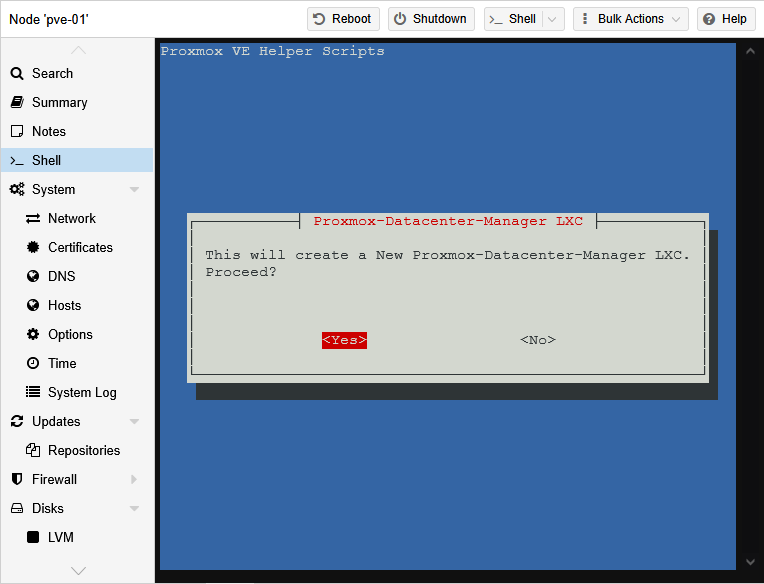
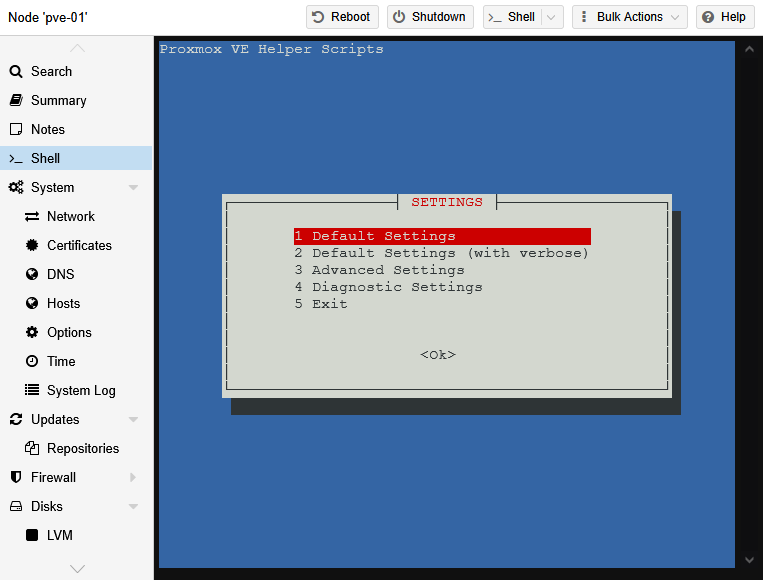
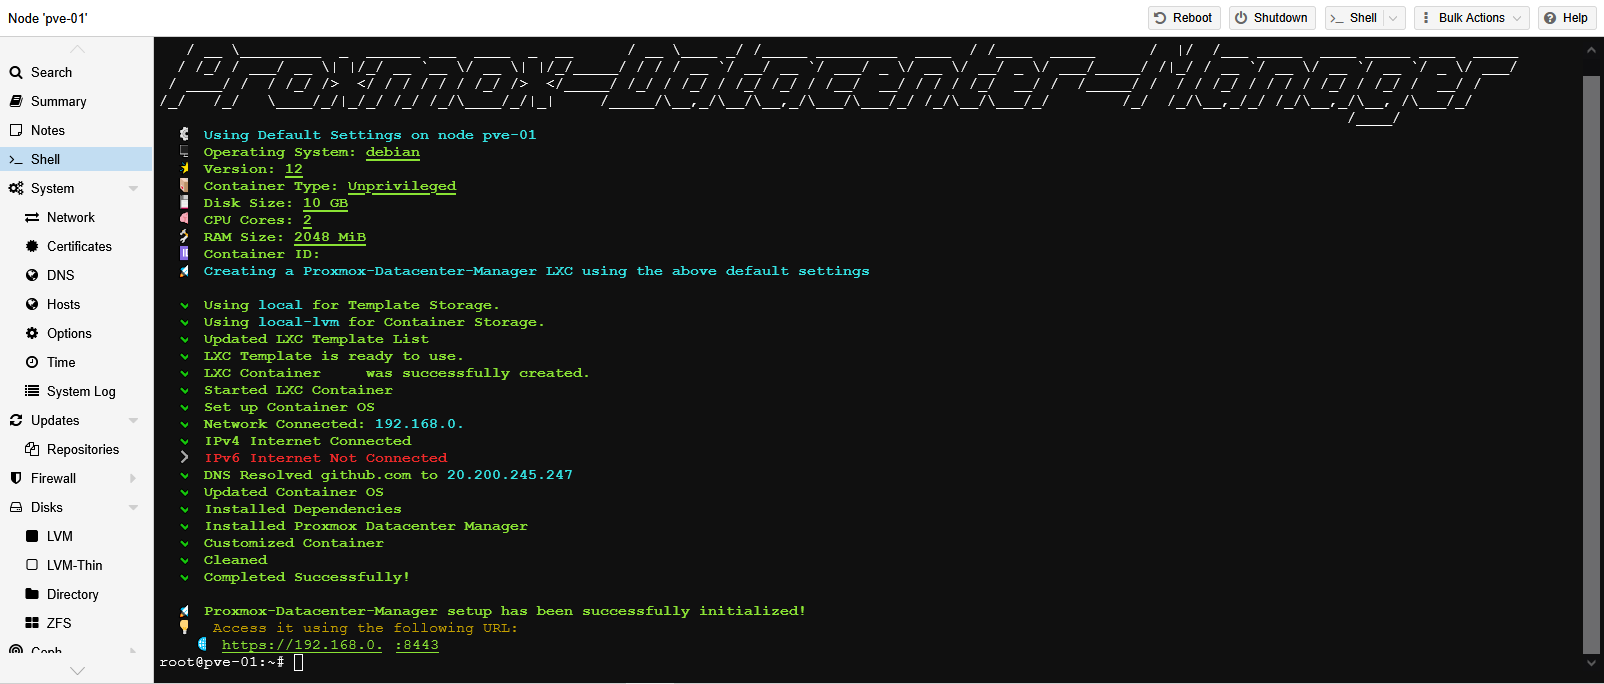
설치를 진행하는 동안 몇 가지 설정들이 나타나는데 여기서는 기본 설정으로 선택하겠습니다.
다음과 같은 화면이 나타나면 설치가 완료된 것입니다.
설정
설치가 완료된 Proxmox Datacenter Manager lxc의 shell을 열고 root 비밀번호를 변경합니다.
passwd root

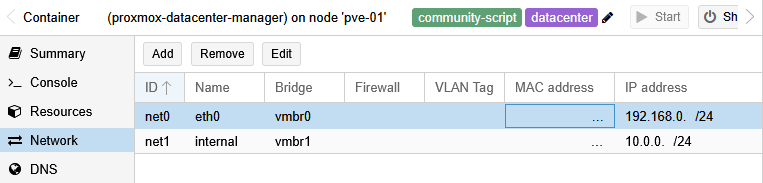
기본 네트워크 설정인 DHCP가 아닌 고정 IP 주소를 사용하려면 Proxmox Datacenter Manager lxc의 네트워크를 설정합니다.
노드 추가하기
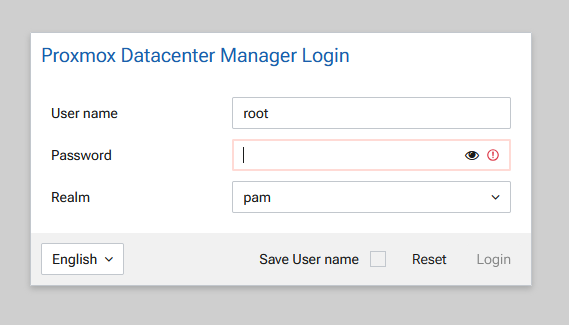
Proxmox Datacenter Manager의 URL로 접속하면 다음과 같은 화면이 나타납니다. root로 로그인합니다.
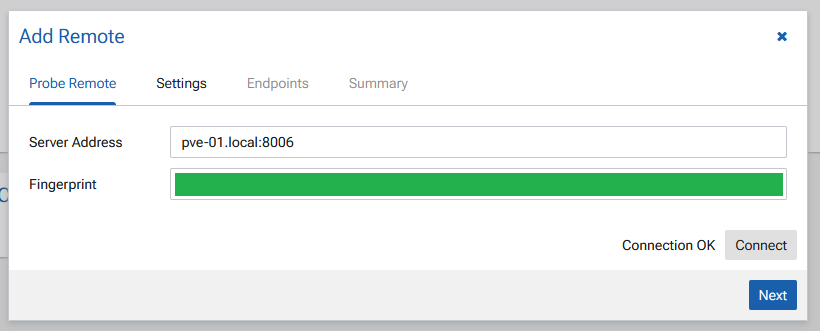
관리할 노드를 추가하기 위해 Remotes 탭의 Add Proxmox VE를 눌러 다음과 같이 서버 주소와 핑거프린트를 입력하고 Connect 후 다음으로 넘어갑니다.
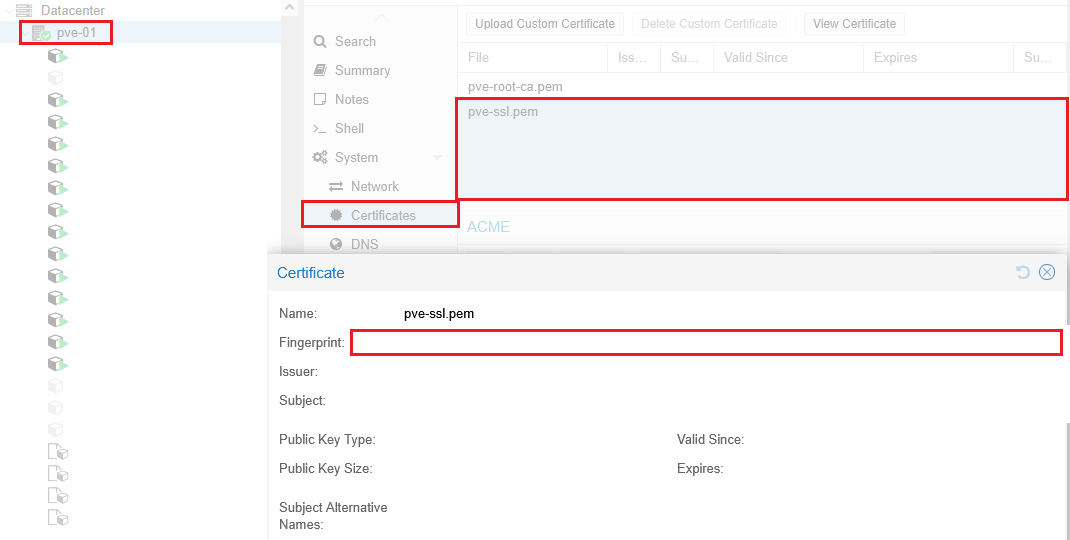
핑거프린트는 추가할 Proxmox VE에서 노드를 선택한 후 Certificates 탭에서 pve-ssl.pem을 눌러서 확인할 수 있습니다.
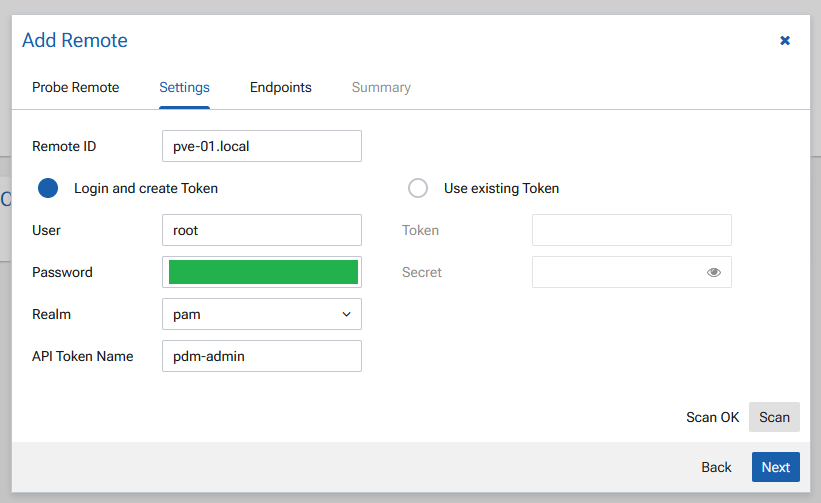
다음 화면에서 Remote ID에 표시할 노드의 이름과 계정 정보를 입력 후 Scan 합니다.
Proxmox VE 2FA는 지원하지 않음으로 해제하고 진행합니다.
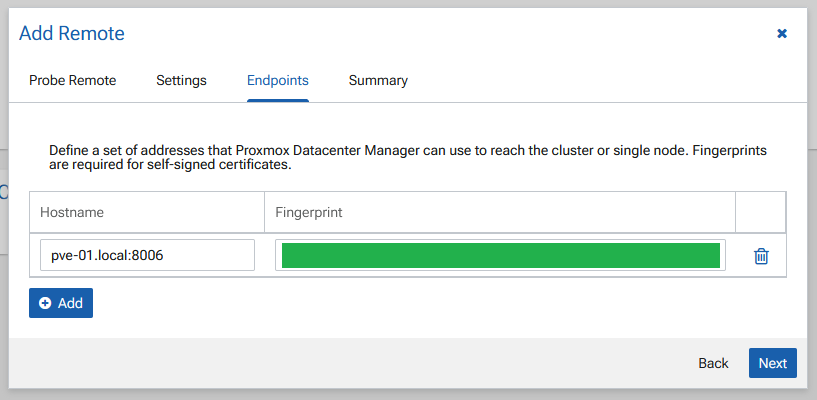
다음 사진과 같이 엔드포인트를 설정합니다.
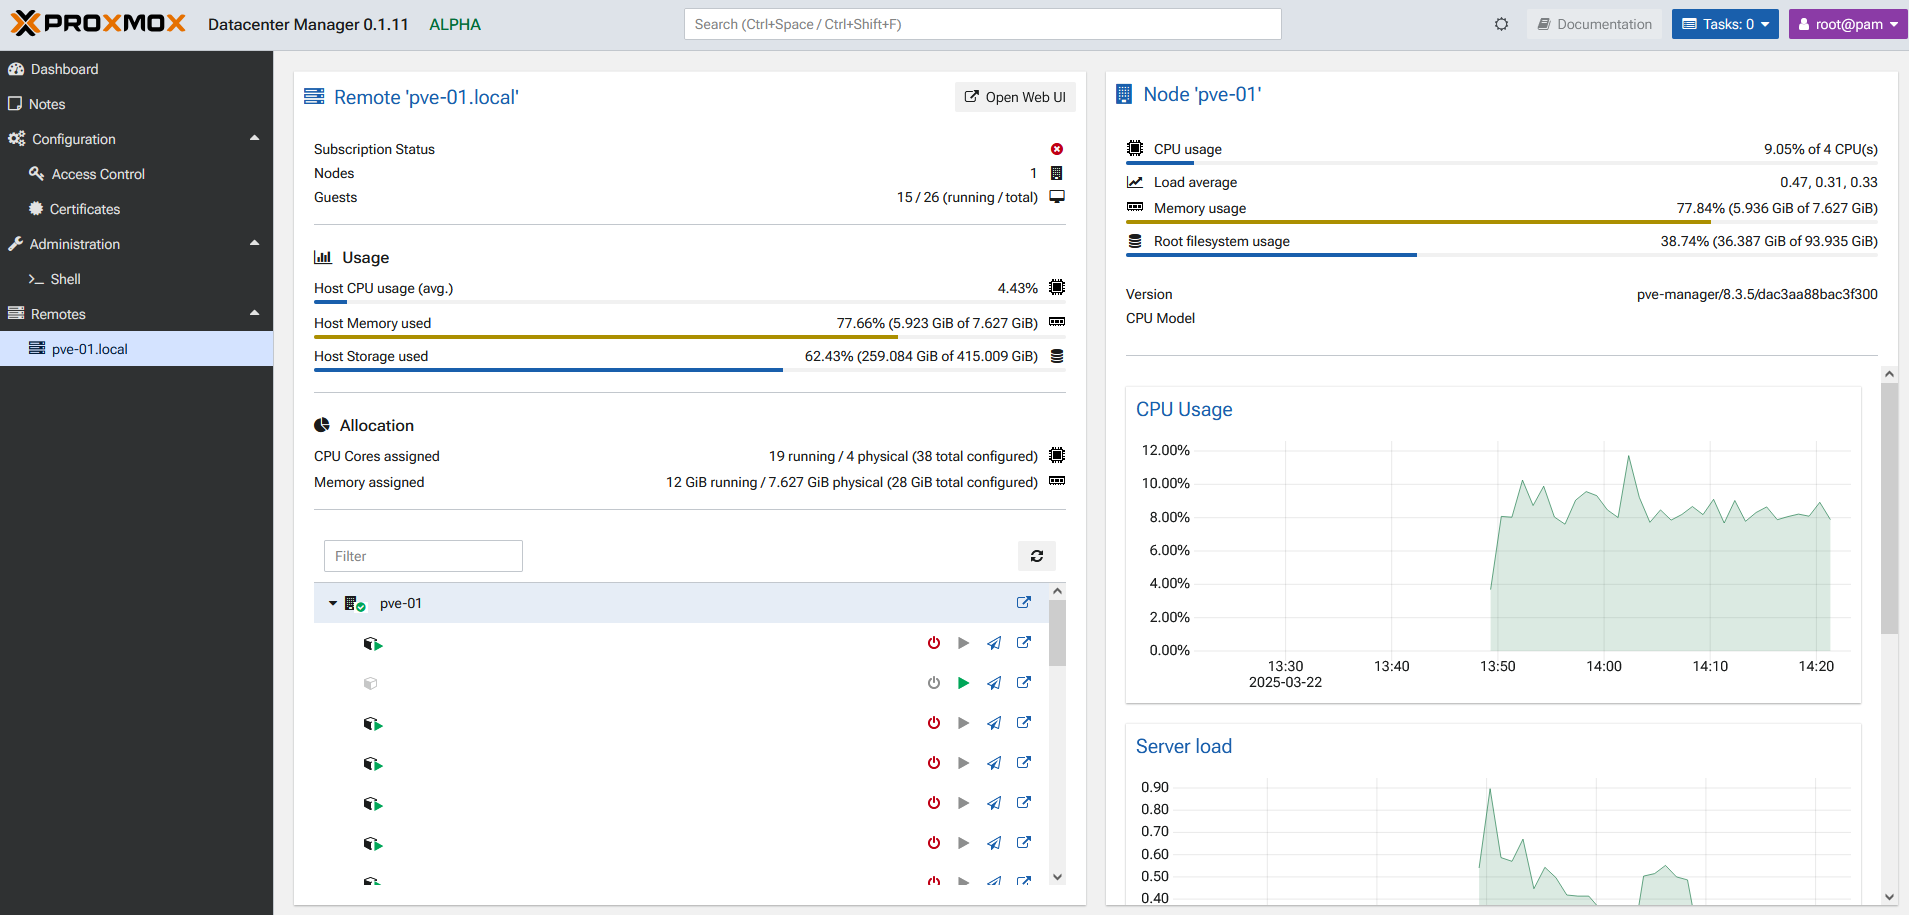
이제 추가된 노드 및 클러스터를 Proxmox Datacenter Manager에서 관리할 수 있습니다.